8.2 Exploding Takes to Multiple Tracks
We'll start by looking at the first of these two methods.
Kind: concept (user-guide-section) Chapter: 8 Managing, Comping and Editing Takes Source: REAPER User Guide v7.70
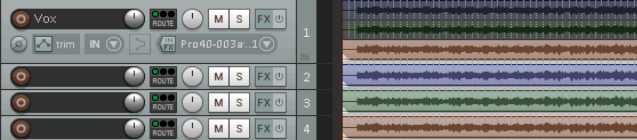
We'll start by looking at the first of these two methods. Let’s suppose that we have recorded three takes of a vocal track. We can right click over the item and use the Take, Explode all takes to new tracks command.
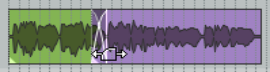
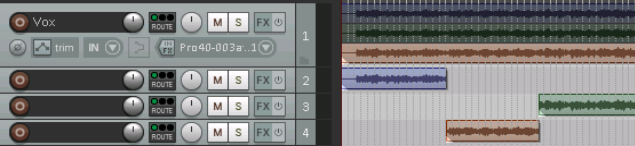
This command creates (in this case) three extra as yet unnamed tracks – the original track with its three takes is still intact. Now suppose that after auditioning we have decided which parts we want to use from each take. In the next illustration, we have edited the various takes to leave only the portion of each take that we wish to keep. This has been done using various editing techniques that have been covered in Chapter 7. Finally, we select the various items from tracks 3 and 4 and use the Num Lock 8 key to move them up to track 2. Track 1 is now muted and could of course be hidden. Tracks 3 and 4 could be deleted. You could now select all of the items in track 2 and use the Glue Items command to bind them together as one media item. Note that the original muted track with the three takes on it is still available. This makes it easy at some later time for us to change our mind about what to include in the vocal track if we wish.

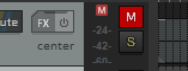
Note: If you are using the REAPER 6 color theme default layout, the mute button is located on the top right corner of the track panel, as shown here.