3.16 Non-Destructive Punch Recording
By default, punch recording is not destructive: it creates a new take, but does not destroy the original.
Kind: concept (user-guide-section) Chapter: 3 Recording Audio and MIDI Source: REAPER User Guide v7.70
By default, punch recording is not destructive: it creates a new take, but does not destroy the original. To use punch recording, follow this sequence:
- From the Options menu choose Record mode: time selection auto punch. Set New recording
that overlaps existing material to Split existing items and add takes (default). All other options on this submenu should be turned off. Disable toggle repeat on the transport toolbar. 2. Select the track and arm it for recording. Right click on the track panel to open the context menu: make
sure that both Fixed item lanes or Free item positioning are both turned off. 3. View the Options menu and for now ensure that Show all takes (when room) is not selected. We'll
look at this shortly. Also, for this example, make sure that Loop points linked to time selection is not enabled. 4. Make sure that the track output is sent to the Master and (if not using direct monitoring) that Input
Monitoring is enabled. 5. Make sure that the Master output is directed to the audio hardware outputs to which your headphones
are connected. 6. Click once on the existing

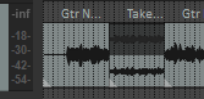
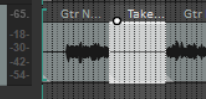
media item to select it. Click and drag along the arrange background area to select the region that you want to be re-recorded (see above). 7. Press Home or W to rewind the track to the start of the track. Press Esc to clear the time selection. 8. Press Ctrl R. You will hear the recorded material up to the start of the defined region, where you can re-
record that passage. Press Space to stop when you have finished recording. Accept the option to save your recorded media. Restore normal recording mode when you have finished punch recording. Your track now contains two media items. What's happened to the originally recorded passage? Well, it's still there and you can still use it if you like. Pressing Ctrl L toggles the display of all takes or active take only (see above). We'll learn more about this soon.
What if you prefer to use the original recording after all? In that case, simply click on it to select it.
Non-destructive punch recording with pre-roll
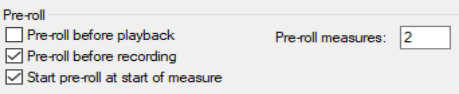
The metronome can be used to engage pre-roll before recording starts. This help you to know exactly when to come in when punch recording. Enable the metronome on your toolbar, then right click over the metronome button to access its settings. Enable Pre-roll before recording and (preferably) Start pre-roll at start of measure. You should also specify the number of measures through which you want the pre-roll to play: the default is two.
Note: The record button context menu includes the option Monitor track media when recording. If you enable this when punching in, say, a guitar or vocals, regular Monitor Input will cause you to hear both the existing and the new material right up to the punch, and during the punch. Monitor Input (tape auto style) will monitor only the existing materials up to the punch, but both existing and new during the punch.
Tip: If you make a mistake or change your mind when overdubbing, you can use Ctrl Z to undo the recording or you can select the unwanted media item and use the Delete key to remove it.
Getting to grips with REAPER's various record modes and in particular how they work in combination with other options (such as monitoring) can be somewhat bewildering for new users. An Appendix includes a summary table Troubleshooting Record Modes and Monitoring.