1.3 Installing REAPER on a Windows PC
To install REAPER on a PC with Windows you should follow this sequence.
Kind: concept (user-guide-section) Chapter: 1 Setting Up and Getting Started Source: REAPER User Guide v7.70
To install REAPER on a PC with Windows you should follow this sequence:
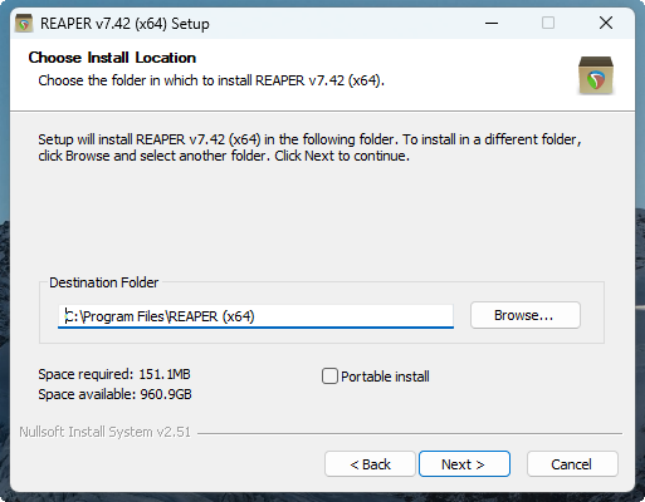
- In Windows Explorer, find the install file. The file name includes the current version number, e.g. reaper70-install.exe. 2. Double click on this file to start the install program. 3. Click the I Agree button to accept the conditions and continue. 4. For a normal install, accept the default folder offered to you (but see note below) for example, C:\Program
Files\REAPER (x64).
-
If you need to, enable the Portable install option (see note below), then click Next. 6. Select which elements you wish to install (if in doubt accept the default settings - see also section 1.4 below) and click on Install.
-
Wait while the program installs. When prompted, click on Close to close the Install program. You will be asked if you wish to run the program now: in this case, choose No. 8. Follow any other on-screen instructions.
Note: If installing REAPER for the first time, or if you wish to replace an existing installed version of REAPER with this one, you should accept the default destination folder and not enable portable install. If you wish to install this alongside an existing installed version (such as 6.xx), then change the destination directory (e.g. to \ REAPER7) and enable portable install. Existing settings and preferences will be preserved separately.
Tip: If you choose not to install some of the REAPER program elements or options, you can later change your mind by simply running the install program again.