11.1 Introduction
Until now, most of the emphasis has been on Arrange View.
Kind: concept (user-guide-section) Chapter: 11 The Mixer and The Master Source: REAPER User Guide v7.70
Until now, most of the emphasis has been on Arrange View. This is hardly surprising, as this is REAPER’s core, if you like, its powerhouse. This where you comp your takes, edit your media items, manipulate your regions and so on – in short, build your projects. As your projects progress, however, you may find that the REAPER Mixer becomes more important. As its name implies, it gives you control over mixing your projects which go well beyond the suitability of Arrange View. The contents of this section should help to familiarise you with the REAPER Mixer and its various features and capabilities. These offer you so much control over your tracks and their features. You will also learn more about how to get the best out of the REAPER Master. Mixer display is toggled on and off using the View, Mixer command (Ctrl M). The default mixer (Layout A) is illustrated in Chapter One.
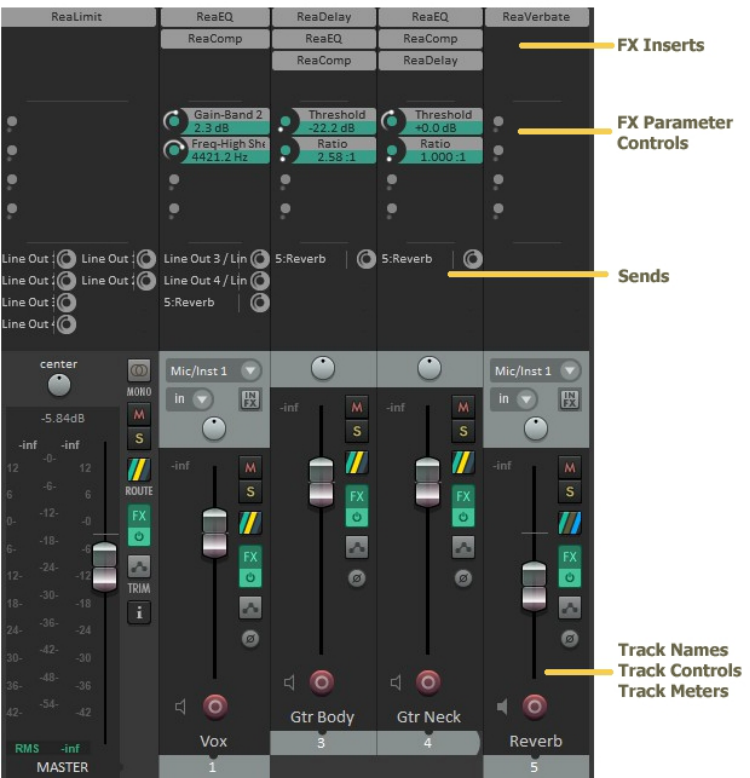
Here you can see a relatively simple example of how you can customise its layout to show much more information and to give you much more control than at first sight seems possible.
You can think of the mixer as being a control center for your entire project: you can create and modify sends, add/remove FX, adjust FX parameters and more, as well as accessing all the usual track controls. If you increase mixer panel height Let’s see how this is done. First, notice that the mixer panel controls work in exactly the same way as their track panel equivalents. For example, use the volume fader to adjust volume and the pan pot to adjust panning. Click on the FX button to add FX, the solo button to solo, and so on. OK, let’s begin …
FX Management: In order to do this ...
… you do this
Make room to display sends, parameter controls, and FX inserts in docked mixer.
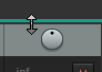
Hover mouse on top of panel, just above the pan pot. When you see a double-headed vertical arrow, click and drag (left drag) upwards then release the mouse.
FX Management: In order to do this ...
… you do this
Show FX above the mixer panel.
Right click anywhere in the empty area of the mixer – for example, to the immediate right of the rightmost track. From the menu, choose Show FX inserts (when size permits).
Add more FX to the panel.
Right click on any FX name, choose Add FX … Select FX in the usual way.
Enable FX parameter controls to be shown in
panel.
Right click anywhere in the empty area of the mixer – for example, to the immediate right of the rightmost track. From the menu, choose Show FX parameters (when size permits).
Select a parameter and add it to the panel.
Right click over the FX name, from menu choose Show FX parameters in panel, then select from list.
Adjust parameter value.
Left click drag up/down on button. For small movements, hold Ctrl while doing this.
Remove a parameter
from the panel list.
Press Alt left click over the parameter name.
Bypass FX (toggle).
Press Shift click (shown in FX chain, right).
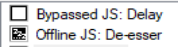
Set FX offline (toggle).
Press Ctrl Shift click (shown in FX chain, right).
Run FX in parallel with
previous FX.
Right click on FX, choose Run FX in parallel with previous FX from menu.
Show track icons.
Right click anywhere in the empty area of the mixer – for example, to the immediate right of the rightmost track. From the menu, choose Show track icons in mixer.
Show FX parameters with their FX (toggle).
Right click anywhere in the empty area of the mixer, from the menu choose Group FX parameters with their inserts.
Sends Management: In order to do this ...
… you do this
Make room to display sends, parameter controls, and FX inserts (if not previously done)
Hover mouse on top of panel, just above the pan pot. When you see a double-headed vertical arrow, click and drag (left drag) upwards then release the mouse.
Show sends above the mixer panel.
Right click anywhere in the empty area of the mixer – for example, to the immediate right of the rightmost track. From the menu, choose Show sends (when size permits).
Add a send.
Drag and drop from Route button of source track to Route button of destination tracks.
Modify send parameters.
Click on send name, or right click and choose Show send parameters. Adjust to suit, then close parameters window.
Mute a send (toggle).
Shift click on send name, or Right click and choose Mute send.
Remove a send (toggle).
Alt click on send name, or Right-click on the send, choose Remove send or simply Alt click.
Adjust boundary between FX and FX inserts or between FX inserts and sends.
Hover mouse over boundary between FX and FX inserts or between FX inserts and sends. To move boundary for one track, left drag up or down. To move boundary for all tracks Ctrl left drag up or down.