3.3 Saving the Project File
After creating a file, use the File, Save Project command (or Ctrl S) to save it.
Kind: concept (user-guide-section) Chapter: 3 Recording Audio and MIDI Source: REAPER User Guide v7.70
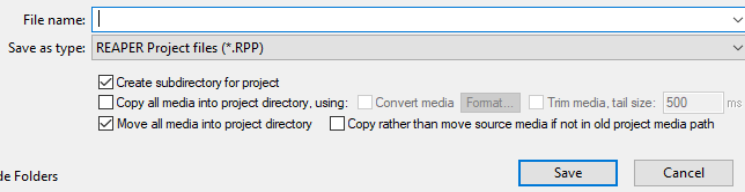
After creating a file, use the File, Save Project command (or Ctrl S) to save it. You will need to specify a project file name. When saving a new file you are offered a number of options. You can choose to Create subdirectory for project. If you also select Copy all media into project directory you may also specify a format for these items to be converted. If you select Move all media into project directory , then by default all media files used by the project will be moved into the project subdirectory. Optionally you can ask to Copy rather than move source media if not in old project media path. You would be likely to choose this, for example, if your project uses files from a samples library, to ensure that the samples are not removed from the library. You should also make sure that you get into the habit of frequently resaving your project after making changes. The easiest way to do this is simply to press Ctrl S.