15.24 Customizing the REAPER Toolbars
You can customize REAPER’s main toolbar, the track panel toolbar, or any of the other general or MIDI toolbars (by default empty) that are available to you.
Kind: concept (user-guide-section) Chapter: 15 Customization: Actions, Mouse Modifiers, Menus and More Source: REAPER User Guide v7.70
You can customize REAPER’s main toolbar, the track panel toolbar, or any of the other general or MIDI toolbars (by default empty) that are available to you. Customizing REAPER's main toolbars (including the MIDI Editor toolbars) can help make REAPER work for you to work the way that you would like it to. For example, you can:
- Remove any of the default icons/commands that you do not wish to be shown.
- Assign a different REAPER command or action to any existing icon.
- Assign a different REAPER command or action to a new icon.
- Assign a custom action or macro of your own to a new or existing icon.
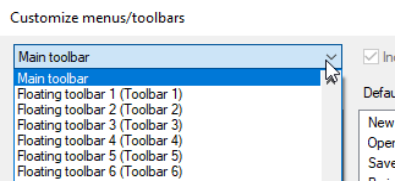
The procedure is similar to that used for menu customization. Make your changes to the existing default toolbar layout thru the Customize menus/toolbars dialog box. This can be displayed by right-clicking over the empty area of the toolbar background, or by choosing Customize menus/toolbars from the Options menu. When the Customize menus/toolbars window is displayed, choose Main Toolbar or one of the MIDI View toolbars from the drop down list in the top left corner. We'll get to Floating toolbars a little later in this chapter.
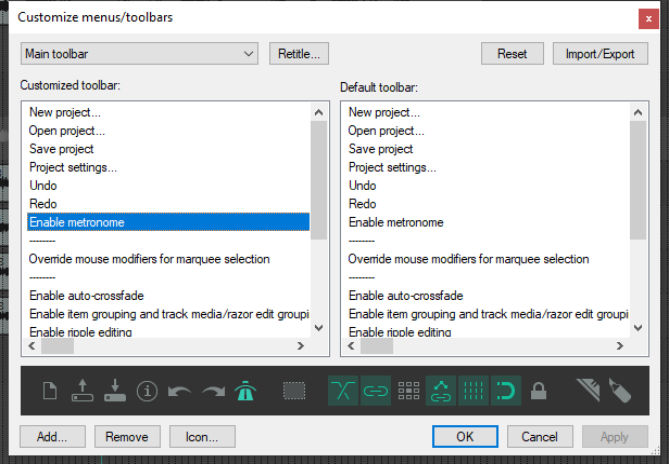
The table below summarizes the main tasks that can be carried out within this window.
After the table there is an example in which you can add to the toolbar an item of your own.
Purely as an example, we'll use the action View: Toggle master track visible for this.
In order to do this ... … you need to do this.
Change the name of a REAPER toolbar
Select toolbar from drop down list. Click on Retitle..., type new name then click on OK.
Remove an item from the toolbar
Click on either the item name in the left panel, or on the icon itself in the display just above the window's command buttons. Click on the Remove button.
Add a new action or command to the toolbar
In the customize toolbar area (left panel) select the item before which you wish to add your item. Click on the Add button to open the Actions window. Select the command, action or custom script. Click on Select/Close. REAPER will add this to your toolbar and assign an icon.
To add a separator space between two toolbar items
In the customize toolbar area, right-click over the second of these items and choose Add separator from the menu.
To change the icon used for any toolbar item (including an item that you have added)
Right click on the icon in the display near the bottom of the Customize Menus/Toolbars window, just above the command buttons. This opens the Select toolbar icon window. Select your required icon, then close the Select toolbar icon window.
Replace a toolbar icon with text
Right click over the item in the list in the left panel. Choose Text Icon from the menu, type the text then click OK.
Change a button’s animation status (toggle buttons only)
Right click on button name (left panel) Select Highlight with animation based on toggle state. Choose to animate whether enabled or disabled and select an effect (highlight or blink) See also Animated toolbar icons section.
Change the action assigned to a toolbar button
In the customize toolbar area (left panel) select the item that you wish to change. Right click, choose Change action, then select from the action list and click on Select/Close.
In order to do this ... … you need to do this.
Change the position of an item on the toolbar
Use the mouse to drag and drop up or down the list shown in the customized toolbar list. Ctrl X / Ctrl V may also be used, as can Cut and Paste from the right click context menu.
Close the Customize Menus/Toolbar Window without saving your changes
Click on the Close button. Choose No when asked if you wish to save your changes.
Save the toolbar with your changes
Click on the OK button.
Restore the toolbar to its default status
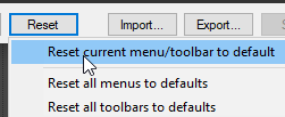
Click the Reset button. Choose Reset Current
Menu/ Toolbars to
Defaults from the menu. Click Apply to confirm'
Export the current custom toolbar or all toolbars/menus as a ReaperMenuSet
Click on Export... , choose Export All or Export Current, then type a name and click on OK (see also note below).
Replace the current custom toolbar or all toolbars/menus with a previously saved Reaper Menu Set
Click on Import... then select the required menu set file, then click on Open.(see also note below)
Note: ReaperMenuSets can also be included when exporting/importing REAPER configuration preferences and settings – see Chapter 22.