7.8 Media Item Properties
All media items have a page of property settings which help determine the behavior of that item.
Kind: concept (user-guide-section) Chapter: 7 Managing and Editing Media Items Source: REAPER User Guide v7.70
All media items have a page of property settings which help determine the behavior of that item. To display an item's properties, select it then press F2, or right click and choose Item Properties, or click on its properties button (if visible). For audio (but not MIDI) items, you can also double-click on the item to do this. The Media Item Properties box will stay open until you close it. If you leave it open, its contents will reflect the properties of whichever item or items is/are currently selected at any time. You don’t need to understand every one of these properties before you get started, just to know where this information is accessed and changed. The main properties contained within this dialog box are:
- Position: can be edited to change the position.
- Length of media item (Position and Length: time, beats, HMSF or samples).
- Fade In and Fade Out: you can define
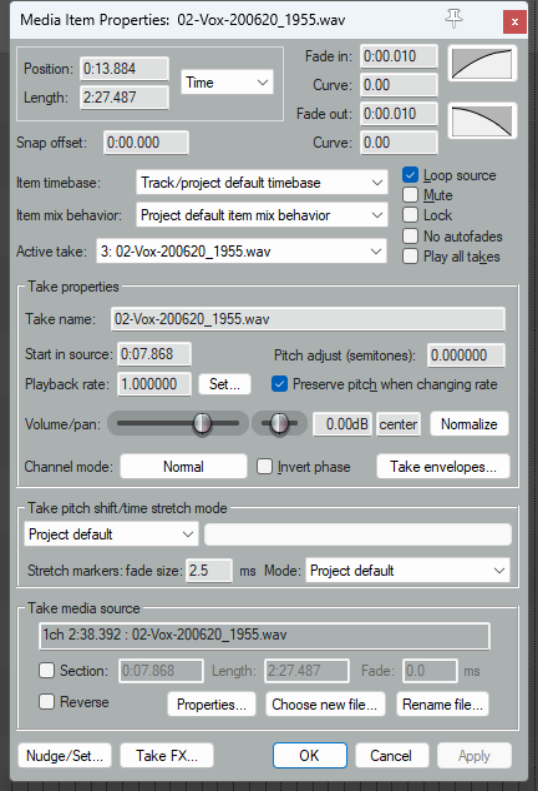
both the length and the shape of these. The setting crossfades source media at the loop point but is limited to the amount of source media available.
-
Snap offset: Offset from the default snap position if snapping is enabled.
-
Item timebase: Defaults to project timebase but can be changed. Options are Track/project default. Time, Beats (position, length, rate), Beats (position only), and Beats (auto- stretch at tempo changes).
-
Item mix: Effectively whether to replace or mix when an item is placed over another. Defaults to project default.
-
Loop source: whether item is a loop.
-
Mute status: mute/unmute item.
-
Item lock status: whether locked.
-
Whether or not to apply autofades at item start and end.
-
Whether or not to play all takes (if two or more takes exist).
-
Active take file name**.**
-
Active take name. By default this is the file name, but you can change this.
-
Pitch adjustment.
-
Start in source: sets start time.
-
Playback rate. For example, type x2 to double play rate of selected items.
-
Whether to preserve item pitch when the playback rate is changed.
-
Adjust Volume and/or Pan: use faders or type values in edit boxes.
-
Option to Normalize to LUFS, RMS, Peak or True Peak.
-
Channel mode: discussed shortly.
-
Whether to invert phase.
-
Add or remove Take envelopes.
-
Which algorithm is to be used for pitch shift and time stretch.
-
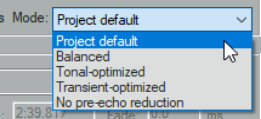
Stretch marker default fade size and preferred Mode (see below right).
-
The option to use only a section of the media item.
-
Options to reverse the item.
-
Display the media item source file properties.
-
Choose a new file to replace the existing source file.
-
Rename the source file.
-
Access the Nudge/Set dialog box for this item.
-
Open the Take FX Chain window for this take/item. After making any changes, use the Apply button to apply them and leave the window open, or OK to apply them and close the window, or Cancel to close the window without applying changes. There is also an option (right-click on title bar) to Apply changes after 2 seconds of inactivity that you can enable if you wish. Some of these options – such as Loop Source and Channel Mode (examined later in this chapter)– are also on the Item Settings menu. For many of them Keyboard Shortcuts already exist or can be defined. You will be shown how to assign keyboard shortcuts in Chapter 15 when we examine the Actions List Editor.
Tip: To change a property (e.g. playback rate) of several items at once, simply select all of the items then, with one Media Properties window open, make whatever changes you require.