2.21 REAPER Routing Essentials
Routing directs media output (audio and/or MIDI) to another track in addition to (not instead of) the track itself.
Kind: concept (user-guide-section) Chapter: 2 REAPER Project Basics Source: REAPER User Guide v7.70

Routing directs media output (audio and/or MIDI) to another track in addition to (not instead of) the track itself. Routing can be simple or complex – and anything in between. This section explains basic routing concepts. More complex options will be covered later in this chapter, also in Chapter 5 , Chapter 17, and elsewhere.
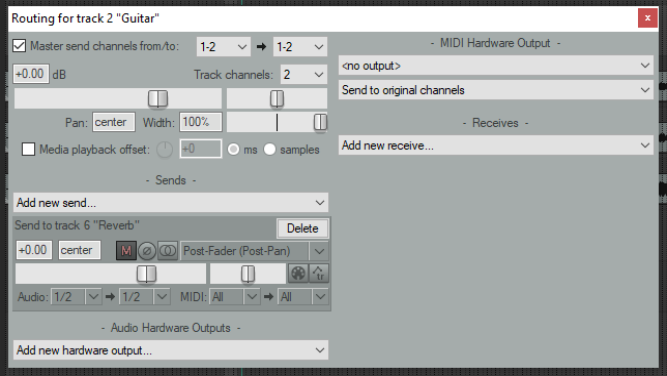
Each track panel includes a Routing Button. Hover the mouse over this button to display a tool tip listing any sends and/or receives associated with that track. Clicking the button opens the track’s routing window. To close the routing window, Escape, or click on the X in the top right corner of the window, or click anywhere outside the window. Routing window display depends on project structure and DAW hardware setup (e.g. audio devices, MIDI devices). Depending on the nature of your project, your display should be similar to that shown here, but not necessarily identical. Note:
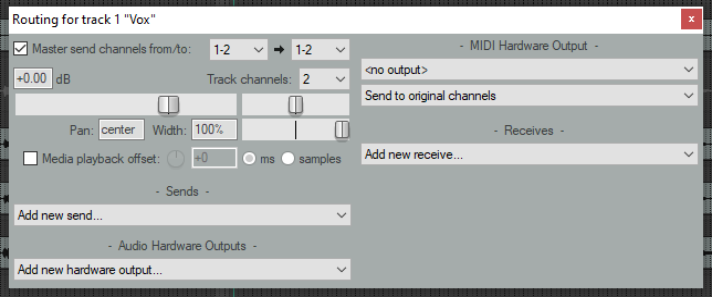
- Master send channels: these direct the track’s output to the Master. In most cases you will want to direct the output of channels 1-2 directly to the Master, as shown for Track 1 (above).
- Parent channels - The example shown above directs audio to the master via channels 1 and 2 (stereo): this is the default. If you wish to send a mono signal to the master, select 1 from the first drop down, then a single channel from the parent channels drop down (e.g. channel 1 or 2 only).
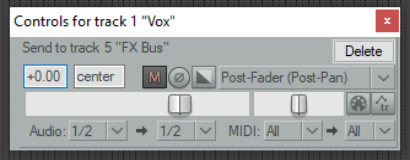
- Sends – In the FX Bus example earlier in this chapter you created sends. A track's output can be routed via a send from any track to any other track(s) or to a new track This will be covered in more detail later.
- Audio Hardware Outputs – as well as (or instead of) directing output to your Master Bus, you can direct output of any track directly to hardware outputs on your audio device. If this device has multiple outputs, this can be useful, for example, for creating a headphone mix, or a series of separate headphone mixes.
- MIDI Hardware Output – Directs MIDI output to an external device.
- Receives – For every send (source) track there will be a receive (destination) track.
- Playback time offset – Can be used to compensate for any latency that might be created (for example) by a third party VST instrument. See also Chapter 10. Notice (above) that a send includes volume and pan faders, and options to send audio or MIDI output, or both.

When you create a new project, by default the output of each new track is routed to the Master and from there to the output of your sound card. REAPER’s routing capabilities go beyond this. In the example below a trackhas both a send and a receive. You will be shown how to do this later in this User Guide, starting at Chapter 5. The early chapters of this User Guide will take you thru basic track routing. After mastering these, you will find more complex examples in the later chapters, especially in Chapter 17.
Note: Sends and Receives can be any of three types - Post Fader (Post Pan), Pre-Fader (Post FX) and Pre Fader (Pre FX). The differences will be discussed in Chapter 17.
The default is Post-Fader (Post Pan), but you can change this in
Options, Preferences,
Project, Track/Send Defaults. See also the flow charts in Chapter 6.
Tip 1: Drag and drop routing. A quick way to create a send from one track to another is to drag and drop from the route button on the source track to the track panel of the destination track -- see also Chapter 17. Tip 2: Track I/O (Route) button context menu. This offers you a number of handy shortcuts. Right click on this button, choose Sends or Receives then select the required track: this will add a new send or receive to/from an existing or new track. This menu can also be used to remove an existing send or receive.