11.9 Stereo Panning and Dual Panning
The stereo panner and the dual panner are designed to give you more control over how you pan stereo tracks.
Kind: concept (user-guide-section) Chapter: 11 The Mixer and The Master Source: REAPER User Guide v7.70
The stereo panner and the dual panner are designed to give you more control over how you pan stereo tracks. They can also be useful with folders. The default pan mode (stereo balance/mono pan) gives you a single pan control which moves the sound between the left and right speakers. However, a stereo track is made up of two channels – left and right. You can see these on any stereo wave file that you record or import into any project. The output of one channel (the top waveform) is normally routed 100% left, the other (bottom waveform) 100% right. Using the dual panner or the width panner you are able to change this in one of two different ways. The dual panner (shown below right)) is the easier of the two to understand. Each of the two pan controls contains one of the channels. Pan the first of these 100% left and the second 100% right and you will hear the first channel thru the left speaker only and the second thru the right speaker only. Reverse these and you will now hear the first channel only thru the right speaker and the second only thru the left channel. Pan both fully left and you will hear both thru the left speaker only. You can adjust both pan controls independently to place each channel exactly where you want it. For example, if you set both controls dead center you will hear exactly the same mix of the two channels thru both speakers. The stereo panner is in some respects more subtle. You can use the width control to adjust the mix of the two individual channels of a stereo media item, folder or submix, and the balance panner to position that overall mix further to the left or the right. Let's work thru a relatively simple demonstration.
Displaying the Dual Panner or Stereo Panner
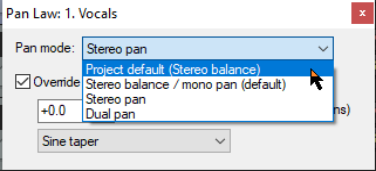
Any track's dual or stereo panner can be shown by right-clicking over the pan fader and selecting the required pan mode. You are most likely to want to do this for a track which contains stereo media items, or which is a folder, or acts as a bus or submix.
Example
In this example we will first create a stereo file in order to help us experiment with the use of the width panner. We will then get a little more ambitious and use it on a submix. This will include rendering the mono media items on two current tracks a single stereo file. The topic of rendering will be covered in detail in Chapter 21.
-
Open the file All Through the Night.RPP and save it as All Through the Night WIDTH.RPP. 2. Mute all tracks except the Guitar Body and the Bouzouki. 3. Pan the Guitar Body 100% left and the Bouzouki 100% right. 4. Choose the Render command from the File menu. Rendering will be covered in detail in Chapter 21. For this example, pay attention to the following settings: 5. Source should be Master mix. Bounds should be Entire project and Channels set to Stereo Set Output format to MP3. Enable the option to Add rendered items to new tracks in project.
-
Click on Render 1 File. 7. After a few seconds, the rendered file will be added as a new track. Give the track a suitable name. It should resemble that shown here.

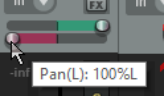
- In this rendered track, the guitar makes up the audio on one channel, the bouzouki on the other channel. 9. Solo and play this track. 10. Adjust the pan control slowly, first fully left, then fully right, then back to the center. As you do so, one
channel will gradually fade away. Panned full left you will hear only the guitar, full right only the bouzouki. Move the pan back to the center. 11. Selected this track in the TCP, right click over the pan control and choose Dual Pan option from the pan
mode drop down list (explained overleaf). 12. Play the song. Slowly move the top pan control to 100% right. You will hear both instruments in the right
speaker only. 13. Move the lower pan control to 100%% left. Now you will hear the guitar in the right channel only, the
bouzouki in the left channel only – the opposite of what you started with. 14. Experiment moving these faders. When finished, move the top pan control to 100% left and the lower pan
control to 100% right. Save the file. 15. Now change the pan mode for this track to Stereo Pan. 16. Play the song. At first you will hear only the guitar in the left speaker, only the bouzouki in the right
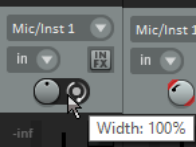
speaker. Slowly move the lower (width) panner from 100% right towards the centre (0W). As you do so, the two instruments will tend to blend more together. 17. With width set at 0%, move the top (pan) control fully left. The mix will now be heard thru one speaker
only. Move it back to the center. Save the file.
Now try this:
- Unsolo and mute the stereo track. 2. Create a folder called Instruments just after the Vocal track. Select Stereo pan mode for this folder. 3. Make the two guitar tracks and the bouzouki tracks child tracks of this folder. Adjust the volumes and pan settings of the individual tracks and the folder to get a nice mix. Pan the different tracks well apart. 4. Use the width control on the folder. Experiment with using this to bring the instruments closer together or further apart. Use the pan control to position the overall mix further left or right. You can still adjust pan settings for individual child tracks within the folder as well if you wish.
Tip: This technique can do wonders when you are mixing vocals, including vocal duets and vocal harmonies!