17.12 REAPER’s Routing Interface
When using multiple track channels with sends and receives you might wish to consider keeping the Routing Matrix in view.
Kind: concept (user-guide-section) Chapter: 17 More Routing Examples Source: REAPER User Guide v7.70
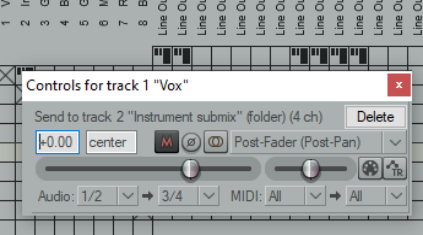
When using multiple track channels with sends and receives you might wish to consider keeping the Routing Matrix in view. You can use your routing matrix to make adjustments to any of your sends and receives, or to specify the number of channels required for any track. Some examples are summarised below. Right click over any track name (as shown above right) to display the Track’s Routing Window and change the number of Track Channels, or to adjust the parameters of any Send or Receive associated with that track. Right click over the Send/Receive signal at any intersection on the Routing Matrix to adjust any of the parameters for that Send or Receive (as shown below right). Click over any vacant intersection on the Routing Matrix to create a Send/Receive at that point. Remember, of course, that you can also create, remove and manage sends and receives in the TCP and the MCP. In either case, you can click on any track’s ROUTE button to

display that track’s Routing Window, or right-click over the ROUTE button and use the fly out menu to easily add a Send or Receive.
Tip: Sends can be copied in the Routing Matrix from one track to another: if you have created a send from (say) track 1 to (say) an effects bus on (say) track 6, then to create similar sends from other tracks you simply drag and drop that send up and down the matrix column. Note: The Routing Matrix right-click context menu can be used to limit what is shown as destinations and as sources – for example, any combination of master/parents, tracks, audio hardware outputs, MIDI hardware and MIDI channels. There are also options to display (or not) tooltips and input activity indicators. The latter causes MIDI and audio input rows to light up in response to any input signal
Note: The three different send types are shown in the Routing Matrix by the symbols on the left. From top to bottom these are Pre Fader (Post FX), Post Fader (Post Pan), and Pre fader (Pre FX). In each case, the height of the large thick bar indicates the send volume level. The flow charts in Chapter 6 will help you to understand the differences between these.
