10.8 Time Signature/Tempo Changes and Markers
The default project beats per minute and time signature for any project are determined by the values assigned in the Project Settings window.
Kind: concept (user-guide-section) Chapter: 10 Pitch and Time Manipulation Source: REAPER User Guide v7.70
The default project beats per minute and time signature for any project are determined by the values assigned in the Project Settings window. You can make changes for the entire song by any of these methods:
- Display the Project Settings window (Alt Enter) and change it there, or press
W to return the edit cursor to the start of the song, then either ...
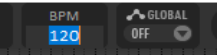
- Type your value in the BPM edit box (shown here) or Time Signature edit box
on the transport bar, or hover your mouse over the BPM edit box and scroll the mousewheel up or down.
- Make a time selection, display the ruler context menu
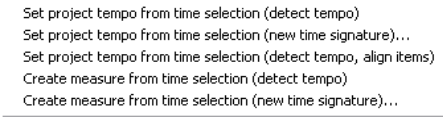
and choose one of the options shown here.
You can also make changes to time signature and/or tempo within a song, using either the project tempo envelope or markers. If you intend to do this, first make sure that your Project Settings are using the default timebase setting Beats (position, length, rate). Pressing Alt Enter will display the project settings dialog and give you the opportunity to change this if necessary.
The project tempo map envelope is explained in Chapter 18. This works essentially like any other automation envelope. Note, however, that editing multiple points at once on this envelope causes each point to be adjusted pro rata, not by a constant BPM value.
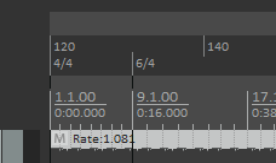
This section focuses on inserting time signature and/or tempo change markers on the ruler to make changes within a song. An example is shown here (right). These changes take effect immediately following the marker’s position. Before looking at how to do this it’s worth noting that:
- Time signature markers and tempo markers are two separate entities but are both inserted on the ruler using the same method.
- At any point along the timeline you can change either the time signature, or the tempo, or both.
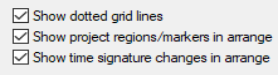
- By default, time signature changes are also displayed as a grid line in arrange view. You can disable this on the Appearance page of your preferences if you wish.
- If you are using either time signature markers or tempo markers it is advisable to enable the relevant ruler
layout options (Chapter 9) to ensure these are displayed. If using both, you should consider also enabling the option to display both types in separate lanes. These options are accessed by choosing Ruler layout from the ruler’s right-click context menu.
Time Signature Markers
The various options and controls for the Tempo/Time Signature Markers window are explained in Chapter 9. In brief, however:
- Position the edit cursor at the required place in the song. From the menu, choose the Insert command,
then Tempo/time signature marker (or press Shift C). 2. Set the metronome pattern. 3. From the dialog box make your choices – e.g. set BPM, whether to Gradually transition tempo to next
marker and/or Set time signature , Allow a partial measure before this marker 4. Click OK. Alternatively, use an action to Insert a tempo marker at edit cursor without opening tempo edit dialog. Remember, you can use markers to set time signature without also specifying a tempo change (or vice versa). Markers can be modified, for example by editing (double-click on marker to open the dialog) or moving them (see table below). Note also that:
- Tempo/time signature markers are by default pinned to the beat position (unless the project timebase is
set to time).
- Manually editing time signature markers requires them to be placed at the start of a measure.
- With snap enabled (Chapter 7), time signature changes snap to bars, tempo changes snap to beats.
- With snap disabled (Chapter 7), moving time signature markers will modify the preceding tempo if
necessary to ensure that the project contains only complete measures.
- Time signature changes that truncate the previous measure are marked with a *****.
- Time signature correction may be problematic when a project contains linear tempo transitions.
- One tempo/time signature marker cannot be moved past another.
- Markers will turn red while they are being moved.
Managing Time sig/Tempo markers: to do this ... You need to do this …
Move a time signature or tempo marker. Left click/drag marker.
Move time signature marker, adjusting previous tempo as necessary to preserve relative position of later tempo changes.
Left click/Ctrl drag marker.
Move tempo marker, adjusting its value and that of previous tempo markers preserving position of later tempo changes.
Left click/Ctrl Shift drag marker.
Move marker, ignoring snap. Left click/Shift drag marker.
Footnotes:
- The above Project tempo/time sig marker left drag actions can be customised on your Preferences, Editing behavior, Mouse modifiers settings page.
- After time signature or tempo change markers have been added to a project you will no longer be able to set project tempo from a time selection within that project.
- The Preferences, Audio, Seeking page includes the toggle option Playback position follows project timebase when changing tempo – see Chapter 22.
- The ripple edit toolbar button right-click menu includes the option Ripple edit all affects tempo map.
- Information about file tempo and transients can be embedded in WAV and AIF files when rendering. See
section Embedding Transient Information when Rendering for detailed information.