13.48 Sequencer Megababy
Sequencer Baby is a pattern sequencer which can be used to play a MIDI synthesizer under program control.
Kind: concept (user-guide-section) Chapter: 13 Working with MIDI Items Source: REAPER User Guide v7.70
Sequencer Baby is a pattern sequencer which can be used to play a MIDI synthesizer under program control. This section is intended to introduce relatively new users to the concept of pattern sequencing, together with a simple example of how one can be used. Beyond this, don't hesitate to explore and experiment for yourself!
We'll start by working thru a step by step example, then go on to examine Sequencer Megababy in more detail.
Example
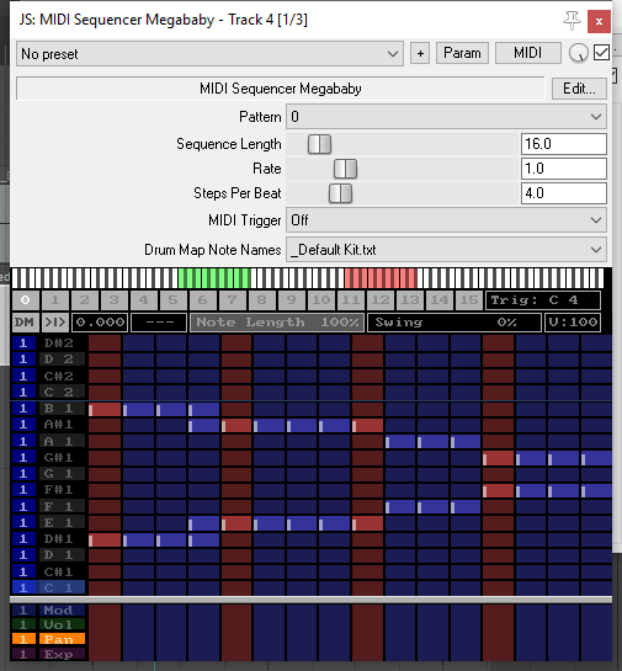
- Create a new file, and insert a single track. 2. Open the track's FX chain and add an instance of JS: MIDI Sequencer Megababy. 3. You need a synthesizer to use with Sequencer Megababy. You could use one of your choice, but for this
example insert an instance of ReaSynth. For now, leave its settings at their defaults, except (as a
precaution) Volume. Set this to about -15 dB. If this turns out to be too low, you can later raise it. 4. Also as a precaution, insert the JS: MGA JS Limiter and set Ceiling to -3.0 dB. 5. Select the Sequencer Baby plugin. Some of its main controls are shown below. 6. Click and drag in a few places (example shown below) to enter a note pattern. 7. Click Play on REAPER's transport bar. This pattern will play over and over again. 8. Stop playback. Change the
Steps per beat value to 8 and play again. Notice the music plays faster. 9. Set this to 2: notice playback
becomes slower. Set this back to 4. 10. Change Sequence length to
- The sequence becomes longer. Draw some more notes. 11.Click on the number 1 above the
pattern grid (but below the parameter controls). A new screen is shown: here you can create another pattern. Do this! 12. Now hold the Alt button while
clicking on the number 1 button. Notice the column headers change color. 13. Play the music. The two
patterns (0 and 1) are now chained. You can chain up to 16 patterns. 14. If you wish, save the file. 15. You can also record the synth's
output as an audio item. Arm the track for recording, choose
Record output (stereo)
from the record arm context menu, then press Ctrl R.
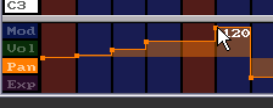
Note: The four lanes below the pattern grid area can be used to set modulation, volume, pan and/or expression values for individual notes or any sequence of notes. Click/sweep to create an envelope: right-click on any node to delete it, right-click/sweep to delete entire envelope.
Summary Examples of Sequencer Baby Keyboard/Mouse Control Combinations
Left click-drag
Draw new notes/ erase existing notes.
Right click-drag
Audition notes without drawing.
Shift Ctrl Alt Left click-drag
“Sweep” draw notes freehand / erase existing notes.
Ctrl Left click-drag
Adjust note velocity.
Shift Left click-drag
Adjust note start offset..
Ctrl Left-click / Ctrl Right-click
Halve steps per beat, slow down / Double steps per beat, speed up.
Left click pattern number
Select pattern number.
Ctrl right-click pattern number
Clear pattern.
Alt Left-click pattern number
Set pattern chain end.
A more complete list can be displayed by clicking on the plugin's Edit button.