12.24 Projects and Subprojects
A powerful feature of REAPER is the ability to build a master project that uses any number of subprojects, rather than having to store all your individual tracks, folders and media items within a single project file.
Kind: concept (user-guide-section) Chapter: 12 Managing The Overall Project Source: REAPER User Guide v7.70
A powerful feature of REAPER is the ability to build a master project that uses any number of subprojects, rather than having to store all your individual tracks, folders and media items within a single project file. This has many potential applications but is likely to be especially useful for projects which require a very large number of tracks or for sound design projects where you might wish to use subprojects to build a single overall audio item. The more the subprojects contain multiple media items which need intricate editing, or make use of features such as automation, parameter modulation and FX, the greater the potential benefits (in terms of project management) of using subprojects. Another example might be for a single subproject (or proxy) to be used in multiple projects (for example, advertisements), so that when it is updated all of the “master” projects are automatically updated.
Before working with subprojects, however, you should first develop a solid knowledge and understanding of REAPER's essential project building features, such as (but not confined to) audio and MIDI recording, the media explorer, editing media items, track and item FX, and automation. In principle, subprojects are not too difficult to understand. In overview, the basic steps involved in using it are as follows:
- Create a new project file in the normal way (Ctrl N), and save it. In doing this, it is advisable to select the option to create a subdirectory for the project. Consider also whether you wish to use one of the options to copy or move all media into the project directory. 2. Create (either by recording or importing, or some combination of both) one or more tracks for this project, such as some foundation tracks or a guide track. You do not have to do this before adding any subprojects, but it can often make sense to do so. 3. Create a track to “hold” your subproject. The reason for this should become clear shortly. Name this track: e.g., if it is for drums, call it Drums, or for strings, call it Strings, or for foley or sound effects call it Foley or SFX, and so on. 4. Select this track and choose the command Insert, New subproject. If you wish, you can set the initial length of the subproject by defining a time selection before doing this. When prompted, accept the default name or make up a name (e.g. DrumsSub, StringsSub, etc.) and click on Save. 5. A short media item will be inserted at the play cursor position. This is (or represents) the subproject. 6. 07Double-click on this item to open the sub-project in a new tab. Two markers are automatically created, (=START and =END) at the start and end of the subproject. They define the rendered portion of the subproject, and can be moved or deleted at any time. 7. Build your subproject by recording or importing media as required. Various options that control playback behavior when working with multiple projects open are available on the project tab context menu. We'll get round to explaining these shortly. 8. When finished, press Ctrl S to save the subproject. The media items will be rendered to a single file which will appear as a single media item on its own track in the main project.
-
Display the main project (select its project tab). You may need to extend the length of the media item on the sub project track to display its contents. You may now close the subproject file if you wish. It can be re-opened by double-clicking on the media item in the main project file. With large projects (e.g. with many sample based instruments) that are slow to load it can be simpler just to keep them open, although doing so will use more RAM.
-
When you play the main project file, its output will now include the rendered contents of your subproject.
Example
Let's now look at an example of how this might be done in practice. To make it easier to understand, this example will be kept to a simple project. After reading thru this, you might be able to then think of a further example that you can try out for yourself using your own projects.
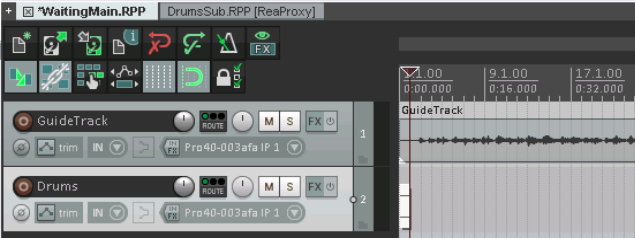
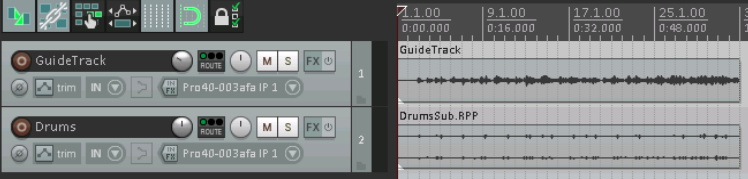
- Here we have created a new project

file, and saved it into its own subdirectory, calling it WaitingMain.RPP, We have recorded a guide track and added a second track, called Drums.
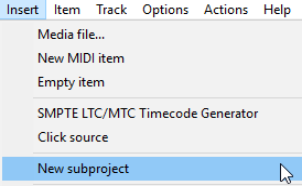
- After selecting the Drums track we used the command Insert, New subproject to insert a subproject
which we named and saved as DrumsSub.RPP. Notice both the short media item that is automatically added to the track and the new project tab above the toolbar.
-
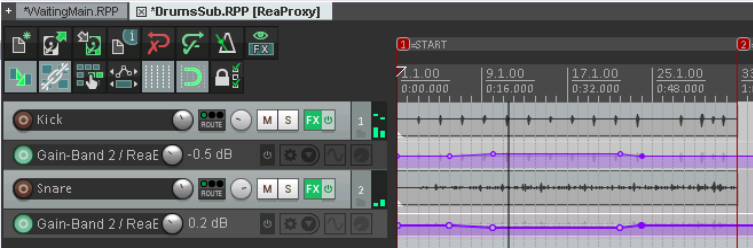
Using DrumsSub.RPP we build our drum tracks in the normal way. For the sake of simplicity, in this example we have just added two tracks, but of course we could have as many as we require. Whenever we play these back, the guide track in the master project will also be heard. Track volume and pan settings are adjusted as required, FX and envelopes are added, and so on. When finished, we move the =END marker to the end of the tracks.
-
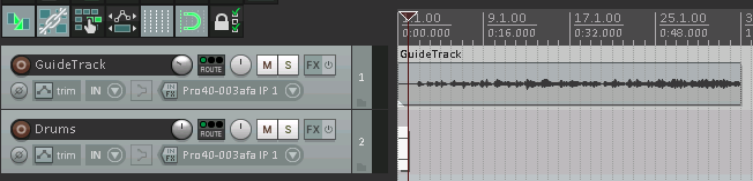
We now save this file. Notice that audio output is rendered as the file is saved. We return to the main project. At first sight, nothing seems to have changed:
-
However, when we extend the media item to the right, we can see the rendered drums.
-
If we close the DrumsSub project and play the main project file, the rendered drums can clearly be heard
along with the guide track. 8. Any later changes that we make to the DrumsSub project will be included in the audio file that is rendered
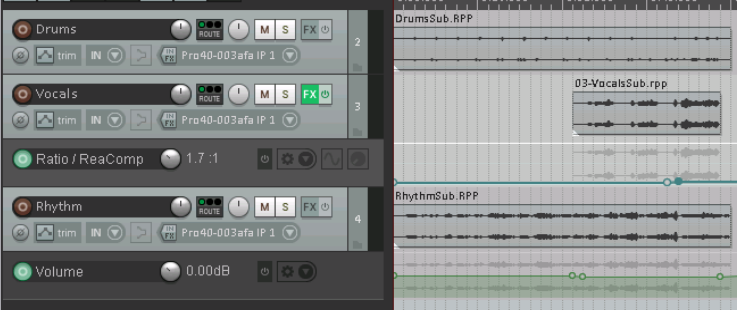
when the subproject is saved. Thus, when the main project is next opened, the audio item on the Drums track will include these updates. 9. We can now add further subprojects, in this example one each for the vocals and the rhythm section. The
guide track is no longer required: it can be muted and hidden. We can also make further edits, add FX, etc. to the rendered subproject tracks:
This example has been kept simple for learning purposes. In practise, subprojects are most useful when working with complex and intense applications such as movie scores, radio programs, large orchestral arrangements, game/video sound design and electronic music production. Another potential application is in finalising an album, with each song being inserted as a separate subproject within a master project.