7.13 Slip Editing
You can slip-edit unwanted passages from the start or end of a media item as follows.
Kind: concept (user-guide-section) Chapter: 7 Managing and Editing Media Items Source: REAPER User Guide v7.70
You can slip-edit unwanted passages from the start or end of a media item as follows:
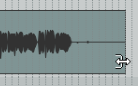
Hover your mouse over the lower part of an item’s left or right edge so that the mouse
appears as a double headed horizontal arrow with a square bracket (as shown here). Click and drag to the right or left (as appropriate), then release the mouse.
Slip Editing Multiple Items
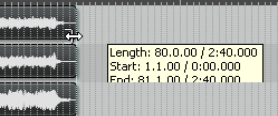
To slip edit several items in different tracks, select all the media items required (for example, hold the Ctrl key while clicking in turn on each item, or use the marquee method), then slip edit any selected item. The change will be applied to all items in the selection (see left), relative to their individual positions on the timeline. You can use Ctrl left drag if instead of this if you want only one item to be edited. You can use the Mouse Modifiers page of your Preferences to customize mouse modifiers if you wosh.. This topic is covered in Chapter 15. Take care when slip-editing adjacent items, especially when they are touching each other. If you click and drag on one of the items so as to create a space between the two, then slip editing will take place in the usual way. However, if you slip edit in such a way as to overlap the items, you will create a crossfade. This is illustrated here, where the end of the first (further left) of the two adjacent items has been slip-edited to the right, overlapping the other item. This behavior can be modified in two ways. Disabling auto-crosssfade (on the toolbar) will stop the crossfade, but both items will still be heard. Enabling Trim content behind media items when editing (Options menu) will ensure that only the slipedited item (the item on top) will be heard during the overlap.
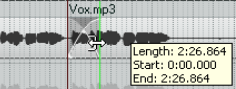
Another technique is to use slip-editing to move the boundary between two adjacent items (perhaps when an original item has been split). Select both items and hover your mouse over the boundary between the items to see the symbol shown here. You can then click and drag left or right to move the boundary.
