2.12 Controlling Track FX
REAPER provides you with a number of tools to help you manage your Track FX.
Kind: concept (user-guide-section) Chapter: 2 REAPER Project Basics Source: REAPER User Guide v7.70
REAPER provides you with a number of tools to help you manage your Track FX. For example, you can:
- Change the order in which they are applied.
- Copy or move any FX from one track to another.
- Save (and retrieve) any sequence of FX as a chain that can be easily inserted into other tracks.
- Bypass individual FX or an entire FX chain.
- Specify a default set of FX to be automatically inserted into new tracks for your project.
In order to do this … You need to do this …
Dock the FX Chain
Choose the FX, Dock FX Window in Docker command.
Adjust the values for track FX parameters
Drag with the mouse, or scroll mouse wheel over, the parameter control fader. For fine adjustments, hold Ctrl key while you do this, or click once on the control and use up/down keys on keyboard.
Adjust the wet/dry mix of any FX
Select the plug-in in the FX chain, then use the mouse to adjust the small rotary control next to the UI button. 0% (completely dry) to 100% (completely wet).

Change the FX Order
Drag and drop FX name up or down within the track FX window.
Float an FX window
Right-click on FX button in TCP and select the FX, or ... Double-click on the FX name in the FX Chain window (toggles). The title bar of the floated window will display the track name, the FX name, and its place in the track FX chain. For example: VST: ReaEQ, Track 1 “Vocal” [2/3], i.e. the 2nd FX in a chain of 3.
Advanced floated FX window options
For more advanced floated FX window options, see the section Advanced Floated FX Window Options.
Keep FX/Add FX window on top
Click on the pin symbol at right of title bar.
Close a floating FX window
Double-click on FX window title bar.
Ctrl drag the FX from to the track panel to another track. To copy automation envelopes with the FX, use Shift Ctrl drag.
Copy an FX (or FX selection) from one track to another.
Move an FX (or FX selection) from one track to another.
Hold down Alt, drag the FX from the source track FX window and drop on the track panel for any other track.
Rename an FX Instance
Select the FX name in the FX Chain and press F2, or right-click and choose Rename FX instance from the context menu.
Bypass an FX (toggle)
Click either the FX check box next to the FX name in the FX chain or the check box in the top right corner of the FX window.
Set an FX offline (toggle)
Ctrl Click either the FX check box next to the FX name in the FX chain or the check box in the top right corner of the FX window.
Replace one FX with another, preserving any existing routing configuration
In Track FX window, either click on Add to display FX browser. Select required FX, then Alt left drag to Track FX window and drop over the FX to be replaced, or … Select the FX in the FX chain and press Ctrl R. In the Replace FX window (now displayed) double-click on the replacement FX.
Make the current track FX the default for new tracks
Within the Track FX window, choose FX, Save Chain as default for new tracks.
Open an FX from track panel
Right click on FX button, then left click on the required FX name.
Remove an FX from a track
Select FX in the track FX chain then click on the Remove button.
Remove all FX from a track
Hold Alt while clicking on the track’s FX button in the TCP.
Search for an FX
Enter text in the Filter List at the bottom of the FX window.
Save the current sequence of Track FX as a chain
In the Track FX window, choose the FX, Save FX Chain command. FX parameter settings are saved with the chain.
Insert additional FX within an existing FX chain
Drag and drop the required FX from the FX window to the required position in the FX chain.
Save selected track FX as a chain
Select the names of the FX to be included in the chain (use Ctrl Click), then choose FX, Save Selected FX as Chain.
Retrieve a previously saved FX Chain (from FX menu)
Within Track FX window, choose FX, Add FX Chain or within the TCP right-click over the FX button and select Add FX Chain from the menu.
In order to do this … You need to do this …
Retrieve a previously saved FX Chain (from Media Explorer))
Drag and drop the chain from Media Explorer window: hold Alt key while dragging to replace existing FX.
Save track FX as the default chain for new tracks
From the Track FX menu, choose FX then Save chain as default for new tracks.
Override default FX load options when opening project file
In Open Project dialog (File, Open project) optionally select Open with FX offline (recovery mode), or Bring FX online after load, or neither of these (default). See also Advanced page of Project Settings**.**
Load your default FX Chain
In Track FX window, click on Add then choose FX, Load Default Track Chain command.
Access the FX Preferences settings
Within the Track FX window, choose the Options, FX Plug-in Settings command. These are discussed in Chapter 22.
Bypass all FX for a track
In the Track Control Panel, click on the FX Enable/Disable toggle button. Click again to reverse this.
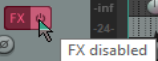
Turns red in bypass mode.
Bypass all FX (all tracks)
Hold Ctrl while clicking on FX Enable/Disable toggle button.