1.17 Output Aliasing
REAPER also supports Output Aliasing.
Kind: concept (user-guide-section) Chapter: 1 Setting Up and Getting Started Source: REAPER User Guide v7.70
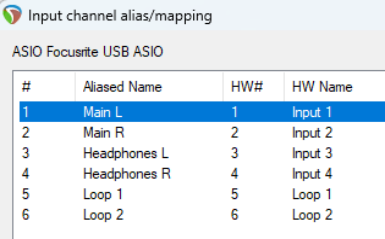
REAPER also supports Output Aliasing. This enables you to give names to your audio outputs, names that make sense to you. This is especially useful if your sound card or other audio device provides multiple outputs. For example, one pair of outputs might be connected to your control room monitors, another to studio monitors, and a third pair to a multi-output headphone monitor. By default, your outputs will have names something like those shown here (below right). Clearly, these names are not very useful to you. Assigning aliases to outputs can ensure that whenever you see them listed (e.g, when specifying the output to be used by your Master) your own names will be displayed, instead of the hardware device output numbers.
Example
To create output aliases:
- Choose the Options, Preferences command. 2. Display the Audio page. In the section Channel
Naming/Mapping tick the option Output Channel Name Aliasing/Remapping. 3. Click on the Edit Names/Map button. 4. Double-click in the Aliased Names column on each item
in turn to edit them. In each case, after typing your preferred alias, click on OK to return to the Output Channel Alias/Mapping window. 5. Click on OK to close this window and return to the Preferences dialog box. 6. Click on OK to close the dialog box. Your specified names will be automatically used throughout REAPER. The topic of assigning outputs to tracks will be covered later, beginning with Chapter 2.