2.27 Docking and Floating
REAPER’s docker can help you to avoid screen clutter.
Kind: concept (user-guide-section) Chapter: 2 REAPER Project Basics Source: REAPER User Guide v7.70
REAPER’s docker can help you to avoid screen clutter. Right clicking over the title bar or background area of most windows opens a context menu relevant to that window. Look for either the option Dock in Docker or Dock Window. When multiple windows are docked, at the foot of the Docker you will see a series of tabs, used to select which window is displayed at any time.
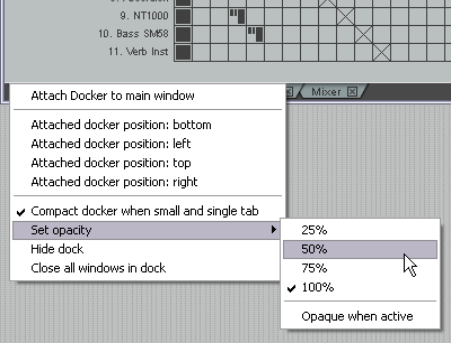
●If a Window is closed while it is closed, next time it is opened it will still be docked. ●To undock a window, right click over the background or tab area of the window and deselect the Dock in Docker or Dock Window option. ●The Docker can itself be attached to the main window or detached and floated. Click over the small exclamation mark in the bottom left corner of the Docker and use the option to Attach Docker to Main Window to toggle. By default the docker will be attached to the bottom of the main window. You can use the same menu to change this position to left, top or right. ●Clicking over the exclamation mark after detaching the Docker from the Main Menu will also give you access to the Set Opacity feature. This can be used to ensure that when floated and not in focus, the Docker is transparent. Opacity can be set between 25% and 100%.
Tip: The keyboard shortcut Alt D can be used as a toggle to show or hide the Docker or Dockers.
For more experienced users, you can work with multiple dockers (see Chapter 12).
As an alternative to docking windows, you can use the toggle command View, Show/hide all floating windows to manage screen clutter. Another useful command can be View, Cascade all floating windows.