19.2 The Interface
We'll shortly look at some examples to show both how parameter modulation works and how you go about using it.
Kind: concept (user-guide-section) Chapter: 19 Parameter Modulation Source: REAPER User Guide v7.70
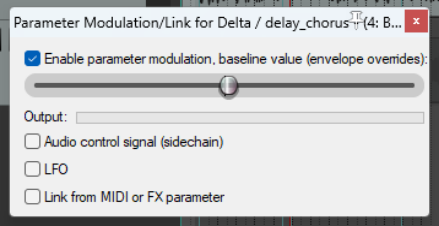
We'll shortly look at some examples to show both how parameter modulation works and how you go about using it. First, here are a few basic terms and concepts. When you select a parameter to be modulated, you will initially see the window shown here (right). In this example, parameter modulation is about to be applied to control a compressor's threshold on a vocal track. This initial window features five basic controls. These are:
Enable parameter modulation, baseline
value. This needs to be ticked for the parameter modulation (PM) to be applied. Unticking this box sets the PM to bypass.
- The horizontal baseline value fader. This determines the starting value of the parameter being controlled. We'll come to an example shortly. Initially, leave this at its default setting (fully left).
- Audio control signal. Ticking this option will open a window which is used to define both which track (or tracks) contains the audio signal that is to be used to control the parameter being modulated, and how you want the modulation to be applied. Don't worry, we'll get to an example soon!
- LFO. This option allows you to use a low frequency oscillator signal (such as sine, square, triangle, etc.) to generate a tone to control the parameter being modulated. This is more likely (but not exclusively) to be used when it is a synthesizer parameter that is being modulated.
- Link from MIDI or FX parameter. This option allows you to link one FX parameter (on a track or media item) to another. An example might be to ensure that as a track or item is compressed more heavily, some presence is added to the EQ (to compensate for loss of dynamics). Another might be that as the wet/dry balance on a delay effect is adjusted to add more delay, the pan position of the delayed signal is automatically moved further out.
Linking from MIDI events will be covered separately, towards the end of this chapter.