13.13 Loop/Time Selections and Smart Editing
To move the position of the cursor, click on the timeline (ruler) in the MIDI Editor window.
Kind: concept (user-guide-section) Chapter: 13 Working with MIDI Items Source: REAPER User Guide v7.70
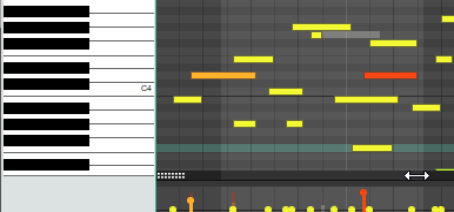
To move the position of the cursor, click on the timeline (ruler) in the MIDI Editor window. Loop and time selection within the MIDI Editor will behave in accordance with whether or not you have enabled the option Loop points linked to time selection on REAPER's main Options menu. These notes assume that you have this disabled. You can select an area to be looped, as in the main REAPER window, by clicking and dragging along the MIDI Editor timeline (see above right). You can also use the REAPER arrange view timeline to define and modify loop areas if you wish. Use the Toggle Repeat button on the MIDI Editor Transport Bar to enable or disable looping. To make a time selection, click and drag along the boundary between the piano roll display area and the CC lane (see right). The mouse cursor becomes a horizontal double-headed arrow. Notice that the time selection is mirrored in REAPER's Arrange view. This facilitates smart editing (see Chapter 7). For example, within the docked MIDI Editor window you could work on the part of a MIDI item that you wish to copy or move to another track and then, still in the MIDI editor, mark that as a time selection. In Arrange view, you could then Ctrl Click Drag that area to another track (or elsewhere on the same track) and create your copy. If using this feature, you should first decide whether or not you wish to enable Auto- select CC when moving/copying within time selection from the Options menu.