4.6 Media Item Preview
Usually you will want to audition items before inserting them into a project.
Kind: concept (user-guide-section) Chapter: 4 Managing Media: The Media Explorer Source: REAPER User Guide v7.70
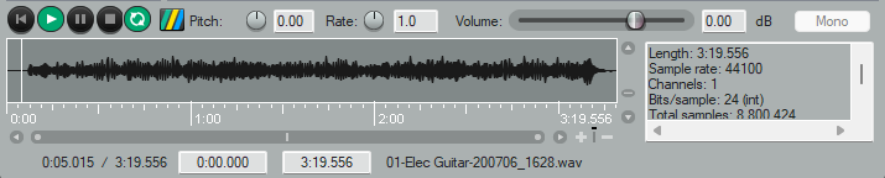
Usually you will want to audition items before inserting them into a project. The media explorer allows you to do this. The Auto play option (on the toolbar) can be used to ensure that by default an item is automatically played when you select it. You also have a number of options available which determine exactly how the preview feature will behave. Also, as you will see in the section that follows this one, you have a great number of options for determining just how items are inserted into your project. Use the Media Information tool (on Media Explorer toolbar) to toggle display of the media information box. Also, identify the main playback controls. The Transport Bar buttons (L to R) are Rewind/Home, Play, Pause, Stop and Toggle Repeat. The horizontal fader (far right) adjusts the volume of playback. Now make yourself familiar with the following features:
In order to do this … Do this ….
Select a file to audition
Use the Explorer Panel to select directory or database. Use the keyboard up/ down arrow keys to move thru file list.
Preview an .RPP file
Enable Preview REAPER.RPP projects in Options menu. Select .RPP file within media explorer. You can also enable Do not auto-render .RPP proxy.
Select a preview panel display option
Use Display preview position options on Display menu – e.g. beats using embedded tempo, whole or fractional beats or seconds.
Audition a file: play and stop
Select file in main panel. To start, click Play button in preview panel, or press the right arrow key or spacebar on your computer keyboard. To stop, click on the Stop button in the preview panel, or press the left arrow key or spacebar.
Restart playback from most recent start point
Press Play on Media Explorer transport bar while media is playing.
Return to start of current item/media file and play
Click first button on Media Explorer transport bar.
Calculate/show loudness stats for item
Choose Calculate peak volume and loudness (LUFS-1) for media from the item right click context menu.
Play item as a loop
Enable the toggle repeat button on the preview toolbar.
Preview with start on bar enabled
Enable Start on bar (on toolbar). Optionally, enable When start on bar enabled, wait for next bar to start preview (Options menu)
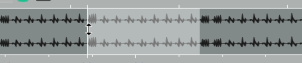
Audition only a portion of a file
Make time selection and use spacebar to start/stop. Drag and drop from either end of selection to extend/shorten it.
Zoom in/out of waveform
Scroll mousewheel up/down.
Scroll zoomed waveform
Shift drag left/right, or Shift mousewheel up/down.
Adjust height of peaks display
Hover mouse over top of display area to show mouse cursor as a doubleheaded arrow. Drag up or down.
Play all files in sequence
(needs repeat to be off)
Select Auto advance to next file after preview from the Options menu. Press Spacebar.
Auto audition selected file
Enable the Auto play tick box.
Synchronize to current project
Enabling Start on bar will ensure that in auditioning the item during project playback, the item playback will be co-ordinated so as to start on a bar.
Audition item within current project
Click on the Routing button and enable Play thru … selected track. Insert a new track into your project. Kep it selected. Playback will be thru this track – you can experiment with volume, panning, track FX, etc..
Use fades when stopping or switching preview
The Options menu has an option Fade in Fade Out Settings. The fade length (in milliseconds), can be set for Fade in on play, Fade out on stop and/or Fade on pause/unpause, s
Tempo match (use toolbar to toggle and choose options)
With this on, the tempo of the selected item is matched to that of the project. Other options include Tempo match half and Tempo match double.
Modify volume
Use Options menu to Apply preview volume to inserted media.
Pitch/Rate rotaries and
Volume fader
Use these to make adjustments while auditioning, or type values in edit boxes next to the controls. The Detect pitch toolbar button displays the pitch in the preview window when auditioning. Enable Options, Apply preview pitch rate to inserted media items to apply pitch when inserting a media item.
In order to do this … Do this ….
Pitch and rate options
Right click on either the pitch or the rate control knob for a context menu of options, also available from the Media Explorer Options menu: Preserve pitch when tempo-matching or changing play-rate (toggle) Reset pitch and rate when changing media (toggle) Pitch shift knob behavior (options are Continuous, Cents, Quarter tones, Semitones) Pitch shift knob range (options are +/- 2, 6 or 12 semitones).
Normalized volume options
The Options menu includes Normalize preview volume [to -0 dB or -12 LU] if peak volume has been calculated, and Apply normalized volume to inserted media items. See also Media Explorer Actions.