7.31 Adjusting Media Item Fades
If you select any item in a track and zoom in close enough, you will see a tiny fadeout curve at the end of that item.
Kind: concept (user-guide-section) Chapter: 7 Managing and Editing Media Items Source: REAPER User Guide v7.70
If you select any item in a track and zoom in close enough, you will see a tiny fadeout curve at the end of that item. You can change both the shape and duration of this curve, either using the mouse, or thru the Item Properties dialog box.

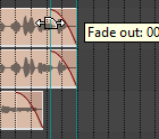
- Select the rightmost item on one or more tracks. In this example (right) two tracks have been selected. These items might be, but need not be, vertically aligned.
-
Hover your mouse over the vertical white line that marks the start of the fade. The mouse changes to display a curved shape.
-
Click and hold down the left button. Drag left to increase the fadeout length (see below left) then release the mouse. Notice that the fadeout curve is now more gradual but it keeps its shape.
-
Make sure that your media items are still selected.
-
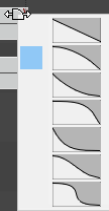
Right-click over the vertical line that marks the start of the fadeout. A menu of different curves will be displayed (see right). You can select any of these. Instead of using a mouse, you can use the Items Properties dialog box (press F2) and make changes there. Also, you can use Alt left click to delete a fade, or Ctrl left click to cycle thru the different shapes.
The Options, Preferences dialog box includes an option on the Project, Item Fade Defaults screen to specify default fade and crossfade length, overlap, and shape characteristics.
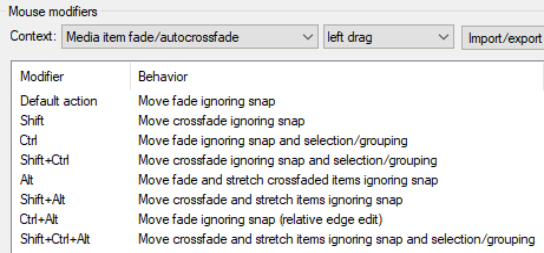
In addition, the Preferences Mouse Modifiers page (shown below) gives you additional functionality by using modifier keys with your mouse when working with fades and crossfades. Options are available for left click, left drag and doubleclick. For example, holding Shift while dragging the mouse left or right will move a crossfade left or right. Alt drag will move and stretch the fade. Other default settings are shown above. These actions can be used on a single media item, or on a selection of media items, and can be customized (see Chapter 15).
Relative vs Absolute Edge Edits
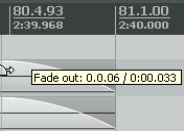
Unless defined as relative, media item fade edits work in absolute mode: this means that within a selection, only those items whose edges align exactly along the timeline will be affected. Actions which work in relative mode (e.g. in this context, Ctrl Alt left drag) will be applied to all selected items, regardless of where they lie on the project timeline. In the example shown here (right), relative edge fading is being applied to three tracks by using Ctrl Alt left drag. All three are edited, even though their positions do not all align.