7.6 Simple Item Grouping
You won’t always need the powerful features of media item editing with track group items.
Kind: concept (user-guide-section) Chapter: 7 Managing and Editing Media Items Source: REAPER User Guide v7.70
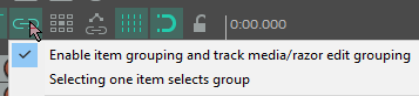
You won’t always need the powerful features of media item editing with track group items. If your needs are relatively simple there is no need to set up track group relationships in order to group and edit items. Provided that grouping is enabled – Options, Item and track media razor/edit grouping, Enable command, or Alt Shift G – items can be grouped together to facilitate working with them. For example, you can move them together, set them all to a common color, mute and unmute them, and so on). Select the items and use G to add them to a group. If you prefer, you can use the Item grouping button on the REAPER toolbar to toggle grouping on and off. For easier group management, select any item in a group then right click and choose Group, Set group name or Set group color. The group name will be displayed above each item in the group. In the example shown below, three of the six items have been grouped. For grouped items a Grouped icon will be displayed if this has been enabled in Preferences, Appearance, Media. Even when this preference is disabled, you will see a thin colored bar above and below all items that have been grouped (see right). Further items can be added to a group. Select any item in the group, then press Ctrl G to select the entire group. Hold the Ctrl key while you click on those items that you wish to add to the group, then release Ctrl and press G. Note that U removes a selected item from a group. You can also use the Group commands on the right click item menu to manage groups.