Introducing Plug-in Pin Connectors
Sending the output of an FX can open up interesting mixing possibilities: for example, you might wish to pan the dry and wet signals independently of each other.
Kind: concept Source: REAPER Effects Summary Guide v3.04
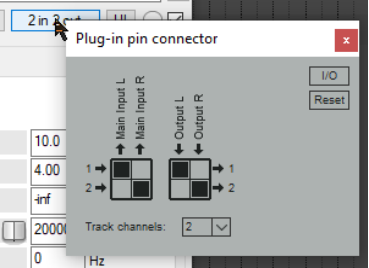
Sending the output of an FX can open up interesting mixing possibilities: for example, you might wish to pan the dry and wet signals independently of each other. You can do this using REAPER’s pin connectors. Clicking on the 2 in 2 out pin connector button will open the window shown here (right). This indicates that your audio signal is currently coming into the plug-in on channels 1 (left) and 2 (right) and going out on the same channels. The track channels dropdown can be used to add more channels. Moreover, by clicking in the individual cells of the matrix you can redirect output to any (and as many) channels as you wish.
Thus, as shown below, you can increase the number of channels to four (from the drop down) and redirect output of the delayed signal from channels 1 and 2 to channels 3 and 4.
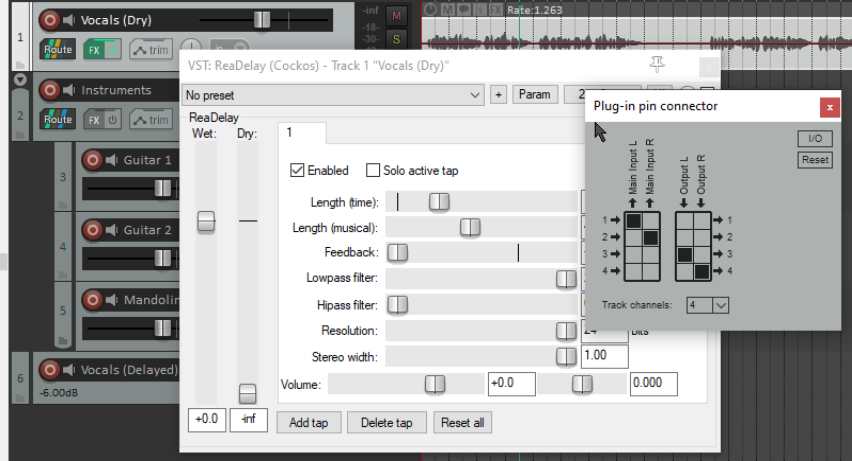
All that remains for us to do is to open the routing window for our destination track (in this example, track 6) and add a receive from the original vocal track. The signal is received from channels 3/4 and output on channels 1/2. If you wish, you could for example now add more FX to (in this case) track 6 such as compression and/or EQ in order to shape the delay effect but not the original dry signal on (in this case) track 1.

Later in this guide, we’ll be looking at other models using REAPER’s pin connectors.